How To Grow Microgreens At Home

When it comes to superfoods, microgreens are hard to beat. However, buying them can be expensive. What many people don’t know is that growing these tiny shoots of goodness at home is relatively easy. Even without a greenhouse or fancy lighting equipment, you could harvest your first crop in as little as seven days.
In our guide to growing microgreens at home, we’ll explain what you’ll need, what you need to do in simple steps, and which microgreens are the easiest to grow.
What Are Microgreens?
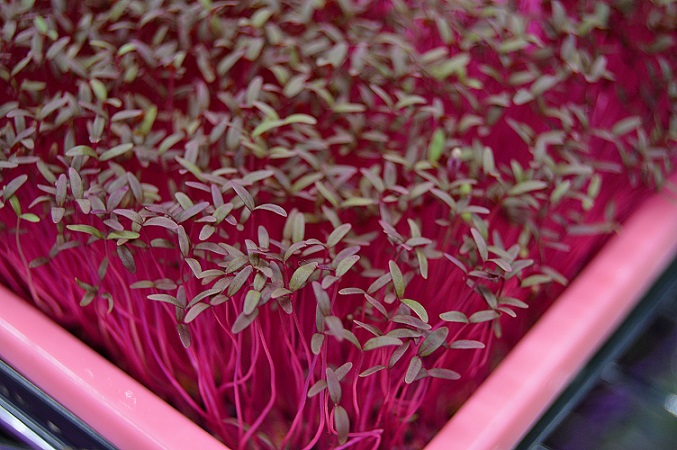
Delicious, nutritious, and packed with flavour, micro-greens are the seedlings of herbs and vegetables. You could call them the infants of the plant world. Not to be confused with sprouts, microgreens (also known as micro herbs and micro vegetables) are the next stage in development, when tiny leaves emerge and grow into shoots.
Despite their tiny size, microgreens are incredibly flavourful and pack a powerful punch of nutrition. A single serving of these baby greens can provide up to fifty times more nutrients than their mature counterparts, making them a valuable addition to any diet.
Until recently, you would only find microgreens in health food shops and fancy restaurants, but today, they are widely available for home germination. Once you have established your microgreen garden, you can harvest crops every week and add them to almost any dish to enjoy their nutritional health benefits.
What You Need To Grow Microgreens At Home
Ideal for urban gardeners and those with limited outdoor space, microgreens will grow just about anywhere. You could grow them on your kitchen windowsill, in a container on top of your garden store, or anywhere with a good source of natural light. All your need to get started is:
- A seed tray,
- Multipurpose organic compost,
- A small watering can or spray bottle,
- Microgreen seeds,
For maximum growth, your microgreens should receive 4-6 hours of sunlight each day. If this is not possible, you can use a simple LED light as a substitute.
How To Plant & Grow Microgreens
You can plant, grow, and harvest microgreens at home in just five simple steps.
Step 1: Fill your seed tray with good quality organic compost and smooth the surface with the palm of your hand.
Step 2: Scatter your microgreen seeds evenly across the surface, taking care not to clump seeds together. Then cover with a fine layer of compost.
Step 3: Water gently but thoroughly using a small watering can or spray bottle. Place the tray in a sunny spot. As mentioned before, you should aim to give your microgreens at least 4 hours of sunlight each day.
Step 4: Water lightly, once or twice per day, to make sure the soil doesn’t dry out. If storing your microgreens outside during the day, remember to bring them indoors or put them in garden storage overnight to prevent frost and insect damage.
Step 5: Your crop will be ready to harvest when the shoots are around 5cm tall with fully formed leaves. This process usually takes between 7 and 21 days, depending on the microgreens planted. To harvest, snip the microgreens at soil level with a pair of scissors, rinse, and enjoy!
Some microgreens regrow after harvesting, such as peas, kale, and beans. You can cut delicious shoots from them several times before planting a new batch.
When the time comes to replant, sprinkle new seeds on top of the existing plants, cover them with a layer of organic soil and water as previously instructed. The old roots will serve as a good source of organic matter and boost your new microgreens crop.
Easiest Microgreens To Grow At Home
You don’t have to have green fingers to grow microgreens at home, but some plants grow easier than others. If you are new to the world of microgreens, the following varieties are a great place to start:
Radish
Tasty, colourful, and easy to grow in just seven days, radish microgreens are ideal for those new to growing micro leaves at home. They make a great addition to salads, sandwiches, and stir fries, and they are a good source of vitamin B6.
Broccoli
Packed with all the goodness of broccoli, yet slightly spicier in taste, broccoli microgreens will add a tangy twist to any salad, pasta dish, or omelette. Like radish, they are ready to harvest in as little as seven days – making them ideal for impatient gardeners! You’ll get a good source of essential minerals such as magnesium, manganese, copper, and zinc in every bite.
Rocket (Arugula)
If you love the peppery taste of rocket, you are going to adore rocket microgreens. They have the same flavour as full-grown leaves – only intensified. These shoots make a delicious addition to egg sandwiches and summer salads, and they are perfect for garnishing meat and fish dishes. Arugula microgreens contain vitamins A, C and K, and they’re ready to eat in just seven to ten days.
If you are interested in even more helpful tips and interesting articles on all things wheelie bin storage. Check out our blog.


